Saturday, July 1, 2017 0 comments

Tips For Tomato Planting – How To Plant A Tomato


Image by C
Tomatoes are probably the most popular summer vegetable for experts and novices alike. Once all danger of frost is past and nighttime temperatures have risen above  55 F. (13 C.) degrees, it’s time to think about tomato planting. If you live in the South, tomato seeds can be sown directly into the garden. In cooler zones, you’ll be setting out transplants; questions about how to plant tomatoes arise.

Tips for Planting Tomato Plants

When planting tomato plants for family consumption, here’s a helpful tip. If you only want fresh fruit, purchase about three plants per person in your household. If you’re looking for fruit to process, you’ll need from five to 10 seedlings per person.
Before we talk about how to plant a tomato, let’s talk about what to look for before planting. Tomato plants should be straight and sturdy and six to eight inches high. They should have four to six true leaves. Those six cell packs will transplant just as well as the individually grown tomato. Planting will be the same for both, but make sure to tear the peat pot off around the top of the individual or make sure it sits beneath soil level.

How to Plant a Tomato

When asking about how to plant tomatoes, the first question is how deep. Tomatoes have the ability to grow roots along their stems, so when planting tomato plants, plant deep; right up to the first set of leaves. This takes care of those leggy tomato seedlings. If the plant is too long and wobbly, dig a small trench and lay the plant on its side, gently bending it into a right angle. Bury the stem in this position leaving those first two leaves exposed. Some gardeners believe those leggy starters will form a healthier plant than those with a more compact form.
Water your seedlings in with a weak solution of high phosphorus fertilizer. Now is the time to choose your support: stakes, cages, or unsupported. How far apart to plant tomato seedlings depends on your chosen support. If you decide to use cages or stakes, place them now so you don’t damage the growing roots later.

How Far Apart to Plant Tomato Plants

Plants should be about 3 feet apart when tomato planting with cages. Staking only requires about 2 feet between plants. Loosely tie the plants to their stakes as they grow, but set the stakes when you set the seedlings. You’ll need 3 feet between the plants and 5 feet between the rows if you’re planting tomato plants to grow naturally.
Friday, June 30, 2017 0 comments

GROWING CELERY INDOORS


Remember when we tested and shared how to grow onions indefinitely last week? Well, at the same time, we've been testing out another little indoor gardening project first gleaned from Pinterest that we're excited to share the successes of today — regrowing celery from its base.

We've figured out how to literally re-grow organic celery from the base of the bunch we bought from the store a couple weeks ago. I swear, we must have been living under a rock all these years or just not be that resourceful when it comes to food, but we're having more fun learning all these new little tips and tricks as we dive deeper into trying to grow more of our own food.

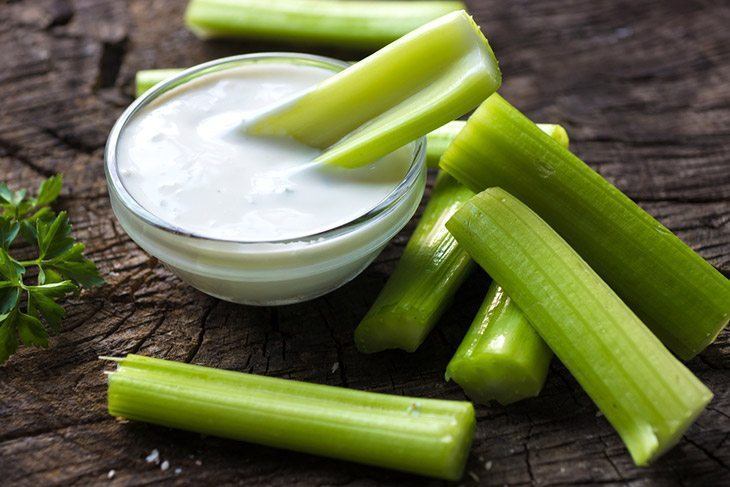
This project is almost as simple as the onion growing project — simply chop the celery stalks from the base of the celery you bought from the store and use as you normally would. In our case, we had a particular homemade bean dip that needed sampling! 


Instead of tossing the base, rinse it off and place it in a small saucer or bowl of warm water on or near a sunny windowsill — base side down and cut stalks facing upright. 


We let our celery base hang out in the saucer of water for right around one week, give or take. Over the course of the week, the surrounding stalks began to dry out significantly, but the tiny little yellow leaves from the center of the base began thickening, growing up and out from the center, and turned a dark green. The growth was slow but steady and evident.


After the 5-7 days were complete, we transferred our celery base to a planter and covered it completely save for the leaf tips with a mixture of dirt and potting soil.


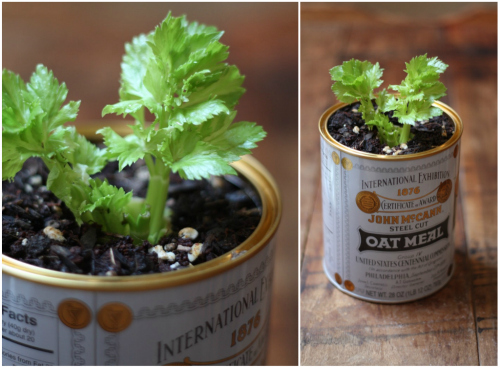
We watered it generously and after planting in the soil, the overall growth really took off. Not only do we have celery leaves regenerating themselves from the base, but you can see clear stalks making their way up and out. It's truly fascinating what we have not even a week after planting in the soil:


A few notes:
  • Change out the water every couple of days while in the "saucer" phase of the project. We also used a spray bottle to spray water directly onto the base of the celery where the leaves were growing out. 
  • The tutorials we saw showed planting the celery directly into the dirt outside — you may want to go this route if you live in a temperate area or want to be able to harvest outdoors. We went with an indoor planter since it's still pretty cold here in VA, we have limited outdoor space in the city, and the space we do have is currently unprotected from our curious puppy.
  • Continue to generously water the celery after planting to keep it thriving.
- + - + - + - + - + - + - + - + - + - + -

Update 1: After a few more weeks of growing time in our sunny window, our celery has continued to thrive. The leaves have grown out generously and bushy and the celery stalks underneath have really taken shape:


- + - + - + - + - + - + - + - + - + - + -

Update 2: Here's how we are looking at almost 3-4 weeks of growth:


Find the full 3-4 week update with even more pics and details on the progress in this post.

- + - + - + - + - + - + - + - + - + - + -

Update 3: Here's how we are looking at almost 5 months of growth, still indoors and still in the same planter:


At this stage, we've been actually been able to cut off stalks as needed in recipes and the celery continues to regenerate leafy stalks from the center of the plant. Find the full 5 month update with even more pics and details on the progress in this post.

- + - + - + - + - + - + - + - + - + - + -

For anyone wondering about the planter, we made it by recycling a tin of steel cut oats we'd since finished. We simply cleaned it out well, then punctured holes along the base to create drainage for the plant.


We placed a thin layer of mulch at the base to help with drainage, followed by a thick layer of dirt/potting soil mixture. After placing the celery base snugly in the planter, we filled the remaining space with more dirt/potting soil to completely cover the celery base. We kept the top to the oats tin and flipped it over to place the new planter on top of it — the lid is a perfect custom fit to the base and catches any runoff from regular watering.

As usual — we'll be sure to keep you posted on the progress of our container celery and hope you'll let us know if you decide to try it out for yourself! If you've tried this before, what other types of vegetables have you known to be able to regrow itself in a similar way?
Friday, June 16, 2017 0 comments

The Best Question: Why Is Photosynthesis Important?

Before we look at the importance of photosynthesis, let us start with your basic understanding of photosynthesis. How well do you understand the process of photosynthesis? According to you, where does this process take place?

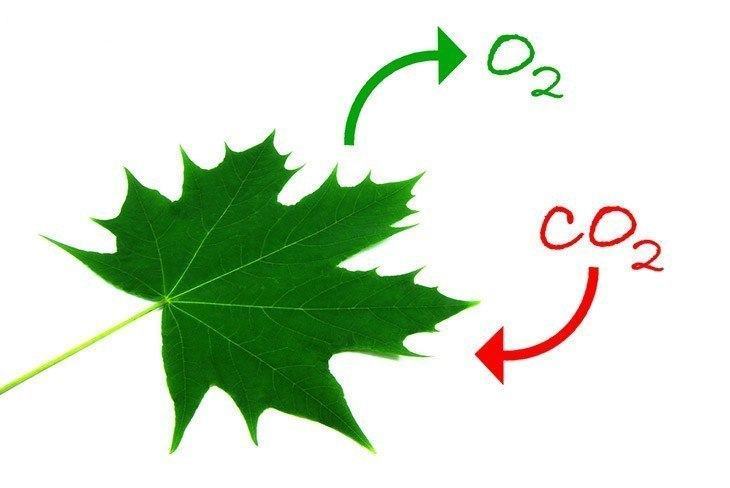
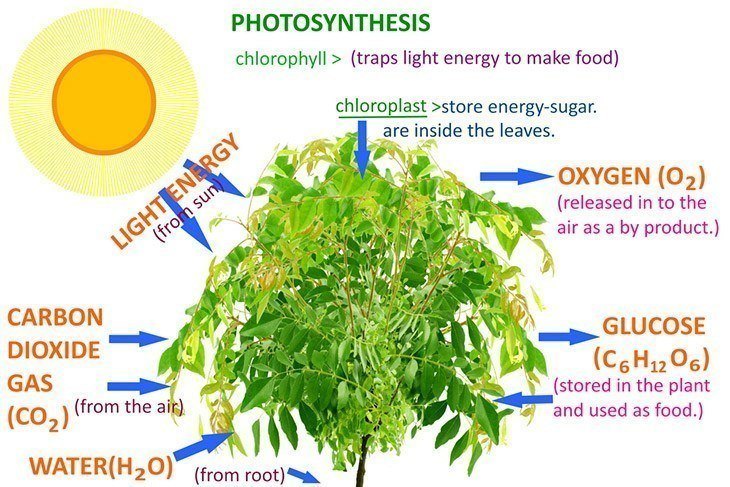
Photosynthesis is simply the process by which plants take up carbon dioxide to produce simple carbohydrates (glucose). This process uses light (the sun rays) to break down the carbon dioxide in the air to oxygen. It occurs in the leaves in two stages known as light and dark stages.


Photosynthesis can also be seen as the reverse of respiration where the by-products of respiration are used as primary raw materials in photosynthesis. Plants use the energy produced during photosynthesis to grow flowers, fruits and seeds. Tree leaves and roots are used as ingredients in manufacturing some medicines. Also, rubber and gum are obtained from plants. This energy is transported to other parts of the plant and even stored in the roots, stems and leaves.


We also can look at plants as being similar to humans in a way. Where absorbed food is concerned, humans store the leftover energy as a backup plan in readiness for eventualities such as threat which will create a flight or fight response due to the release of adrenaline. This response will use up energy in humans and you can imagine what can happen if they did not have stored food that is converted to energy.
Now that you have a rough idea of what photosynthesis is all about, let us take a look at the value it has to plants.

Importance of photosynthesis

Photosynthesis has much importance to plants such as:
1. The main benefit of photosynthesis to plants is that they are able to produce their own food. Plants produce glucose during photosynthesis which plays a vital role in its growth.
Just as humans need to eat at certain times to maintain normalcy, so do plants. They need to produce food regularly to eat and provide energy to perform other functions.
2. Through photosynthesis, oxygen is produced as a by-product of the process. Oxygen is important to every living organism and plants need oxygen for respiration. Without respiration, the plant will not get the energy to perform certain tasks that are vital for its survival.

3. During photosynthesis, plants generate carbohydrates which are used in the growth of seeds, fruits and even flowers which play a huge role making the plant what it is.
The fruits attract animals to it. These animals then defecate close by and provide natural manure for the plant to continue surviving to continue the cycle.
4. Ensure the continuation of the plant species. When plants use the food they produce generate energy to produce flowers, they attract pollination agents such as insects and birds who carry the pollen grains to another area and the plant species is continued.
Moreover, the flowers can also self-pollinate in the presence of wind or rain. Pollination refers to the process by which pollen is transferred to the female reproductive organs of a plant leading to the fertilization (is the fusion of the gametes to initiate a new organism).
5. When plants produce leaves, fruits and even flowers, there comes a time when they fall to the ground and creates a chance for some other plants to eat because they rely on decay as a source of food. Toadstools are known to grow where organisms are decaying.
6. Heterotrophic plants also rely on plants. This is because they feed on animals that eat plants. Snap trappers such as the Venus flytrap and the waterwheel plant have been eat animals that eat plants.
7. The glucose produced is also used to make cellulose which is an organic compound. Cellulose plays a role in the strengthening of the plant’s cell wall. Cellulose not only plays a role in the protection of the cell wall but also gives the plant an upright structure for both aesthetic and structural value.
Aesthetically, if a plant is not upright, it is not attractive and structurally, if a plant is wilted it is a sign of poor health or lack of enough light. Cellulose ensures that plant communicates the right message.
8.  Photosynthesis also enables trees to stay longer even as the weather gets harsh. When climate changes and the trees prepare to shed leaves, photosynthesis occurs more often to produce enough food to sustain the plant. The food is then stored in the roots.

I’m glad that you found us. My name is Julia, and I am a gardener at heart. Spending time in the dirt surrounded by my plants and nature is the best way to spend my time. My goal isn’t just to give you facts. I want to share my experiences with, tips and tricks that I have learned from my time gardening. Follow her on Leekgarden.com! 


How Long Does Celery Last?

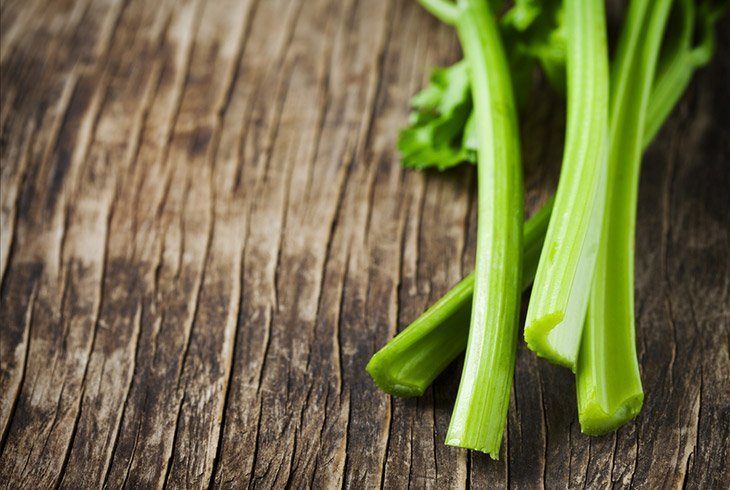
Celery is a staple grocery item for any home or chef. It is used in thousands of dishes, helping to increase the flavor profile. From chicken soup to stir fry dishes, you need to have celery available. Celery also is a fantastic snack, with a delicious crunch when you take a bite. It is full of vitamins with a few calories, making it a great snack. When you pull out the stalks from the refrigerator, you probably wonder how long does celery last. No one wants to use gross food in their dinner!


Whether you purchased stalks at the grocery store or harvest it from your garden, the shelf life typically isn’t listed on most fresh vegetables. They don’t always have a sell by date or even a best before the date that lets you know how quickly to use the item. Let’s take a look at how long does celery last and how to store it properly.

Determining the Shelf Life of Celery


Celery is a tricky vegetable because, unlike other veggies, it doesn’t always give the clearest signs that it's nearing the end of its shelf life. However, there are some recommended guidelines to consider.
  • Fresh, whole celery typically lasts for three to four weeks.
  • Prepackaged celery lasts only for two to three days. You can find these in the fresh produce selection. Sometimes it is chopped as well.
  • Cooked celery has a shelf life of one week.
  • Sliced or chopped celery lasts one to two weeks stored in the refrigerator.
  • Celery can be frozen for six to eight months. This long term option only works well if you blanch the stalks first and use a freezer safe container. However, once defrosted, frozen celery only works well in cooked dishes.
There is no definite way to answer how long does celery last. Instead, the answer is based on the storage method. Depending on how you store your celery, it will alter its best used by date. All methods are cold; you can’t leave celery on the counter. If celery warms up, you will notice it quickly loses its crispness and crunch.


I’m glad that you found us. My name is Julia, and I am a gardener at heart. Spending time in the dirt surrounded by my plants and nature is the best way to spend my time. My goal isn’t just to give you facts. I want to share my experiences with, tips and tricks that I have learned from my time gardening. Follow her on Leekgarden.com! 

Sunday, June 11, 2017 0 comments

Help! How to Keep Birds from Eating Grass Seed: 6 Easy Ways

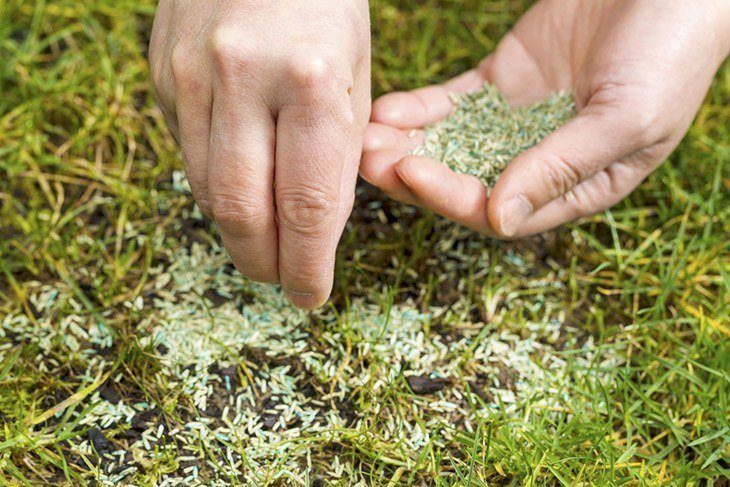
Growing new grass can be a finicky task. Sometimes, it takes forever to germinate. You might water too much, or birds might eat the seeds. When all of your seeds are disappearing, you might wonder how to keep birds from eating grass seed.
Birds can pick away at a sowed lawn in a short time. Before your lovely seeds fully sprout, birds will kill your new lawn. Unless you want to spend your entire summer trying to plant multiple batches of grass, there are a few tricks to keep the birds away.

Things You Will Need

  • Straw – one bale covers around 1,000 square feet of space!
  • Rake.
  • Burlap Sheets.
  • Wire U Pins.
  • Mylar Tape.
  • Posts.
  • Rubber snakes.
  • Pinwheels.
  • Plastic owls.
  • Aluminum pans.
  • Tin cans.
  • Old CDs.
  • Noise making ducks.
  • Helium balloons.
  • Bird Feeders.
  • Bird Seed.

Ways to Keep Birds from Eating Grass Seed


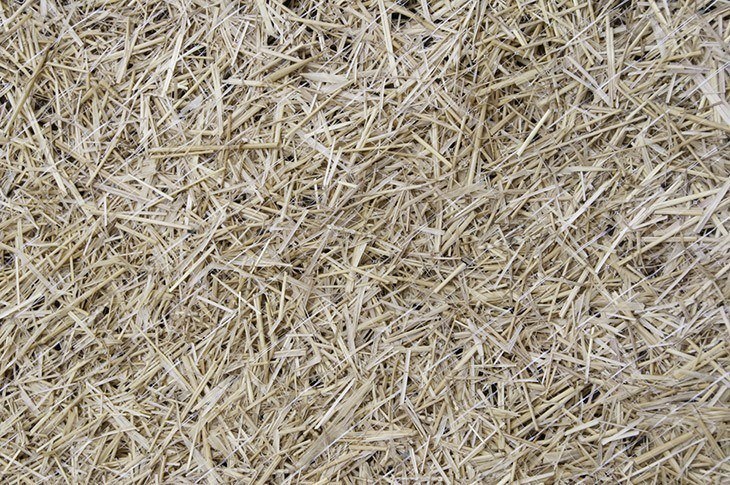
1. Straw: One of the most common methods to stopping birds is simply laying a thin layer of straw on top of the newly planted seeds. You want to it to cover about 75% of the seeds. You only keep the straw on top of the seeds until they germinate. At this point, you should gently remove the straw with a rake or by hand. Sprouts need sunlight to grow, so the straw must be removed.
  • Try to rake the seeds into the ground well first before you use straw. You don’t want them in more than an inch or two, but this allow could discourage birds to leave the seeds alone.

2. Burlap Sheets: Another method for covering up grass seed is to use burlap sheets. Burlap allows water heat and sunlight to reach the soil beneath, encouraging germination. You might select burlap if you live in an area that receives a lot of wind. Straw tends to blow away easily, leaving the grass uncovered. If you want to use burlap, simply lay sheets over the top of the seeds gently. Then, use wire U pins to anchor down the burlap. After germination, remove the burlap.

3. Try Mylar Tape: Some homeowners use metallic Mylar tape because it moves and flashes in the sunlight. As it moves, it also creates a noise that will deter birds. Together, the combination frightens all of the birds away.To use the Mylar tape, you need to put in a few tall posts around the area. Typically, they are three feet tall. You want to put the poles around six to seven feet apart. Tie the Mylar tape between each pole, but make sure you don’t tie it too tightly. You want the strands to move freely in the wind so it can flash and make noise.


4. Scare Them Away: Birds are scared away easily. You probably know that if you have walked close enough to birds, they fly away in an instant. Take advantage of their personality. Whatever option you pick, it is important that you move the objects around at least a few times a week. Birds are intelligent, and they will soon realize they are decoys otherwise.
  • Birds don’t like snakes, so some homeowners like to leave around rubber snakes. These are cheap; you can find them for $1 at dollar stores.
  • Pinwheels aren’t just for decoration. They are effective measures for keeping away birds. The movement, noise and shiny surface tend to deter them from landing nearby.
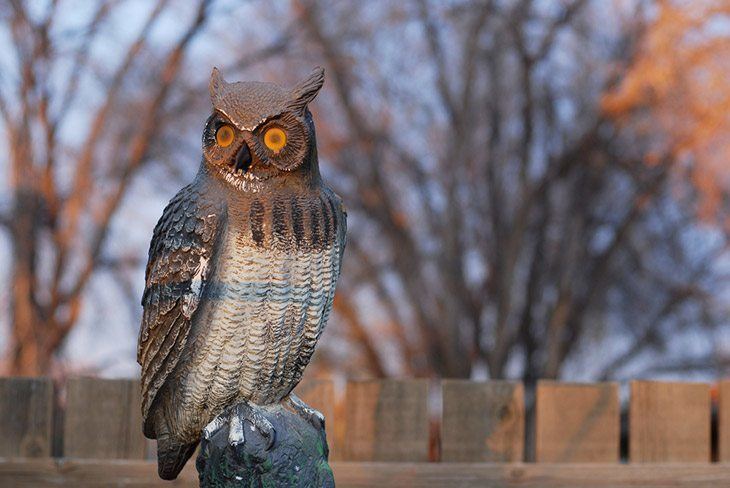
  • Plastic owls aren’t a normal, appealing decoration for your lawn, but they are effective at scare away birds.
  • Shiny, helium balloons can be tied to posts or anchored with rocks. Birds can’t stand balloons!
  • Aluminum tin pie pans can be tied to posts as well. These are effective because they shine and also make noises when blowing around by the wind. The sound of the pans smacking against a post will stop almost any bird.
  • Old CDS also work just as well! You will need to tie them to sticks or posts. CDs don’t make as much noise as the aluminum pans, but they do shine and frighten away birds.
5. Make Noise: Birds typically prefer quiet areas. This is why you will notice a flock in your backyard early in the morning before the kids plow outside. Once the kids are outside making noise, birds tend to stay away. Take advantage of this and use noise devices to deter birds as often as possible.

  • There are wooden ducks you can purchase that move their wings with the wind. Some of the ducks also can make sounds.
  •  Wind chimes are a lovely addition to any home patio. Besides making beautiful sounds with the wind, birds don’t like them. You can hang a few around the area where you planted grass seed.
  • Above, aluminum pans were mentioned. You could also use the same method with tin cans tied with strings to posts. They will bang around with the wind.
6. Distract Them: Sometimes, the birds are persistent, and you might get frustrated with constantly trying to deter them. If worse comes the worse, one of the best methods of keeping birds from eating grass seeds is to give them something else to do. Hang up a few bird feeders on the opposite side of your lawn. Birds are attracted to bird feeders. They also love bird baths!
  • Remember that birds go through bird seed fast. You will want to fill up the bird feeders daily to keep them away from your grass seed. As soon as the food is gone, they will go back to the grass seed.

Conclusion

Birds naturally love grass seed. There is little you can do to stop the love affair. Once you lay down grass seed, it is you against the whole population of birds. The best method is to try to lay something over the top to stop them from eating the grass seed before germination.
​Once germination occurs, your sprouts are still delicate. Try using decoy methods, such as rubber snakes and tin cans, to stop the birds from visiting your lawn. Learning how to keep birds from eating grass seed is truly just a trial and error process to see what works best for the birds in your area!

Source: leekgarden.com